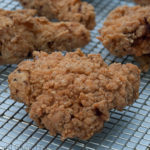
Gluten Free Extra Crispy Fried Chicken
If you prefer not to use buttermilk, try using dill pickle juice instead! Remove the salt you would normally place in the buttermilk. If you forgot to marinade your chicken, go ahead and use the buttermilk as a dip before dredging through flour. The chicken won't be as tender but it will still taste great!
Servings: 8 pieces
Ingredients
- 7-8 pieces of bone-in skin-on chicken (I used 4 thighs and 4 drumsticks)
- 2 cups buttermilk
- 1 ½ cups corn starch or arrowroot starch
- 1 cup gluten free flour blend
- ½ teaspoon guar or xanthan gum omit if in blend
- 1 ½ Tbs kosher salt divided
- 1 ½ Tbs ground black pepper divided
- 1 teaspoon baking powder
- ½ teaspoon cayenne pepper
- 1 teaspoon garlic powder
- 1 teaspoon onion poweder
- 1 teaspoon paprika
- 7-9 cups peanut or canola oil
Instructions
- In a baking dish or bowl (non-metal), combine buttermilk and ½ Tbs kosher salt and 1 Tbs black pepper. Add chicken to buttermilk mixture and make sure the chicken is mostly covered. Cover and refrigerate at least 4 hours, or up to 24 hours.
- Remove chicken from refrigerator and allow to rest for ½ hour before preparing.
- Using a deep fryer or heavy cast iron pan, heat peanut or canola oil to 350 degrees F.
- In a large flat dish, combine corn starch, gluten free flour, guar gum, 1 Tbs kosher salt, ½ Tbs black pepper, baking powder, cayenne pepper, garlic powder, onion powder and paprika.
- Working with 1 piece of chicken at a time, remove chicken from buttermilk and lightly coat in the flour mixture. Place the chicken back in the buttermilk, coating all over and then place back in the flour mixture. Coat the chicken again heavily in the flour, making sure to get flour in the cracks. Repeat this process with each piece of chicken, but only coating with flour right before you're going to fry it.
- Carefully place the chicken in the oil and allow to cook for 6-8 minutes, or until the internal temperature reaches 165 degrees F.
- I typically have room for 2 pieces of chicken to cook at one time, but whatever space you have, be careful not to overcrowd your chicken.
- When the chicken is cooked, remove from fryer and place on a wire rack over a baking sheet. At this point I like to check and make sure my chicken is cooked all the way through by inserting a thermometer to make sure it's hit 165 degrees F.
- You can turn your oven on very low if you need to keep the cooked chicken warm while you finish. Try not to set your chicken on or under paper towels as this creates steam that will soften the crispiness you worked so hard to make!