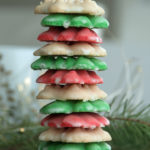
Gluten Free Spritz Cookies
Bite-sized, melt-in-your-mouth gluten free spritz cookies!
Servings: 5 dozen (about)
Ingredients
- 1 cup unsalted butter, room temperature
- ⅔ cup granulated white sugar
- 1 egg
- ½ teaspoon almond extract
- 1 teaspoon vanilla extract
- 2 ¼ cup gluten free flour blend
- ½ teaspoon guar or xanthan gum (omit if in flour blend)
- ½ teaspoon salt
- Optional: food coloring of desired colors
Icing
- 2 cups powdered sugar
- 5-6 Tbs milk
- ½ tsp almond extract
- ½ teaspoon vanilla extract
Instructions
Cookies
- In a stand mixer using a paddle attachment, cream butter and sugar until well-combined, scraping down the sides of bowl before adding next ingredients.
- Add egg, vanilla and almond extracts and combine for 1-2 minutes. Scrape down the sides of the bowl.
- Add gluten free flour blend, guar gum, and salt. Mix until everything is combined and pulls away from the bowl.
- At this point you can add whatever color(s) you desire with food coloring, or you can leave it as is.
- Remove dough from stand mixer and wrap in plastic wrap. Place in refrigerator for at least 4 hours or overnight.
- When ready to bake, preheat oven to 375° F and prepare your baking sheets by lining them with silicone baking mats or parchment paper. Using a cookie press, place your dough inside with the desired shape to cut. I like to use about 1 pump per cookie, but you made need to determine what looks best with your cookie press. The cookies will not spread much, so you can place them close together, about 1 inch apart.
- Bake for 5-6 minutes. Be careful not to over bake as they brown quickly.
- Allow to cook on cookie sheet for a few minutes before transferring to a cooling rack. They are delicate little cookies while they cool, so make sure to give them as much time as you can to cool before transferring. They firm up the longer they sit.
Icing
- In a small to medium sized bowl, combine all icing ingredients with a whisk. The icing should be fairly runny and will drip down the cookie, but you want this so the decorations on the cookie will come through.
- Once the cookies are completely cooled, dip each cookie into the icing mixture. I only dip the front side of the cookie (if you dip the entire cookie it's difficult to remove from the rack once it's cooled) and place on a cooling rack until completely dried. To make clean-up easier, place wax paper under the rack to catch any drippings. If you would like to add sprinkles, do so before the icing dries, close to right after the cookie is iced.
- Once the icing is completely dry, you can place in an air-tight container and enjoy for several days.